How to use Assemble with Adobe Premiere Pro
A guide to roundtrip media from Adobe Premiere Pro to Assemble, bringing back a rough cut sequence (aka timeline) to Adobe Premiere Pro
What is Assemble? Text-based video editing so you can highlight the transcript text of soundbites and then drag and drop them into the desired order to form the spine of your story and export back to your NLE a sequence XML. Learn more.
Notes (updated Dec 21, 2020):
- Import regular clips.
- Multicams don't work seamlessly because multicam clip structures aren't supported by sequence XMLs that Adobe recognizes. If you want to use multicams, you can manually align multicam clips using markers.
- Do not import sequences to edit in Assemble as Assemble doesn't support starting with it. This is because Adobe doesn't send the references to the underlying clips in the sequence to extensions. The main premise is: Assemble creates sequences from clips so the process should begin with importing clips.
Steps:
- Import media:
Use the Simon Says extension for Adobe Premiere Pro (download) to import regular clips.
Alternatively, import your raw footage, or create h264 low-res MOV proxies, to the Simon Says website: you can upload it directly or import media via a cloud drive such as Dropbox, Box and Google Drive. Ideally proxies have the same filename as the originals so you can easily relink it when bringing the sequence back to Adobe. (Note: Simon Says has a mac app for importing but it doesn't import the timecode as the macOS native transcoder doesn't read timecode to pass it to the mac app on ingest; instead use the other methods mentioned above.)
2. Pay and Transcribe your clips. New users get free credit.
3. Simon Says Assemble
Once your project is transcribed, you can edit your transcripts and identify speakers, either in the Adobe extension or on the web (via www.SimonSaysai.com).
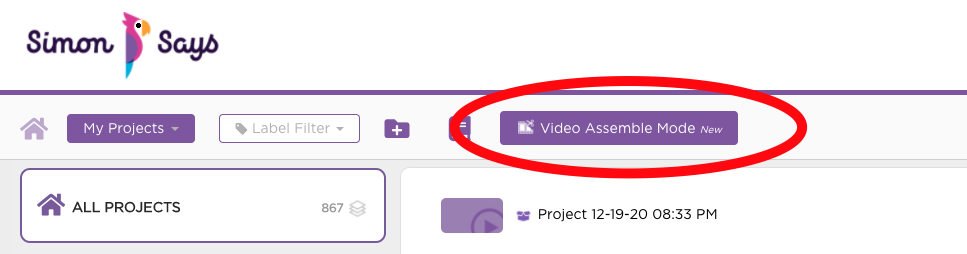
Once you finish editing your transcripts, go into Assemble mode. You can do that via the dashboard on the website and click on the button that says “Video Assemble Mode”. Or click here.
4. Create an Assemble project
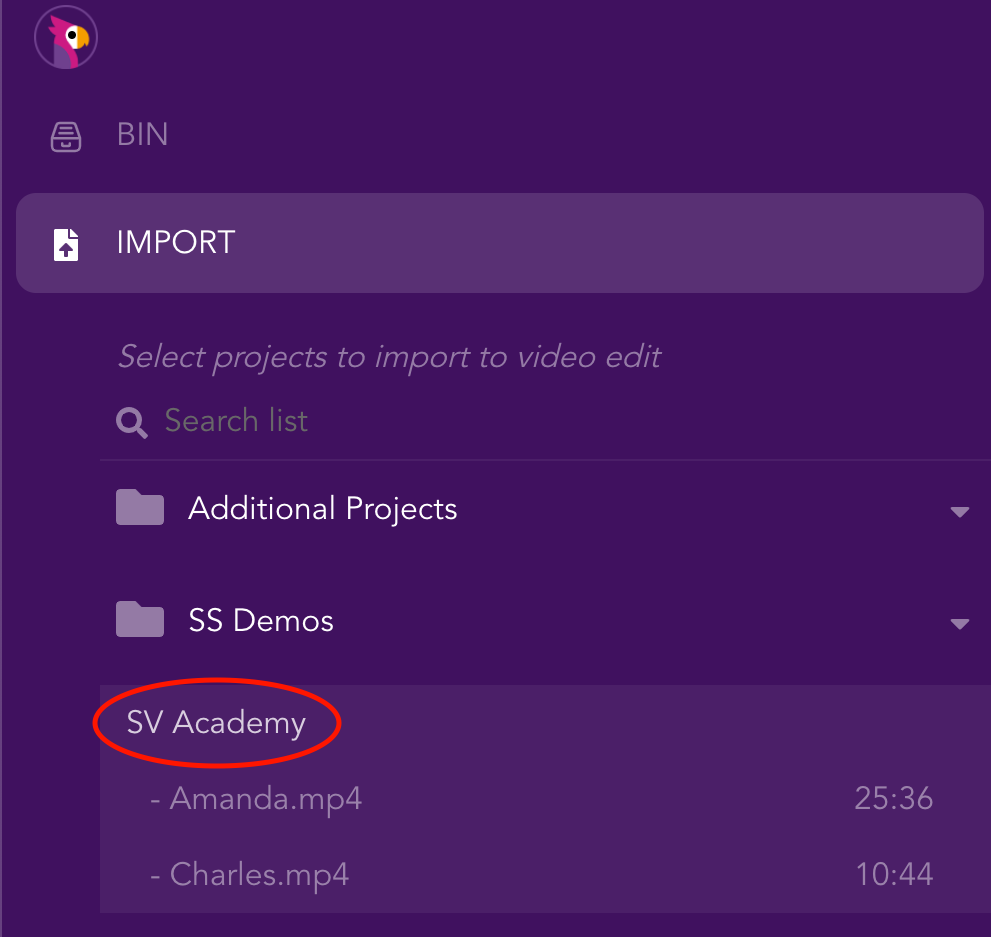
You'll now be in your Assemble dashboard. Create a new Assemble project:

On the left-hand side, you’ll see three buttons.
- The Simon Says logo takes you to your Assemble dashboard where you can create a new project or select an existing one.
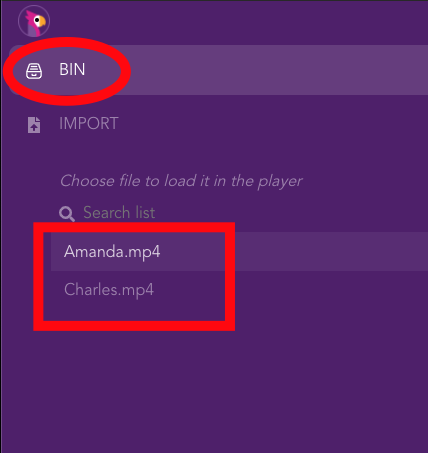
- “BIN” is where all of your media will be stored. Right now it’s empty.
- “IMPORT” is where, you guessed it, you can add media from your transcription projects.
Let’s go ahead and select our SV Academy project that we just transcribed.
Important Note: Projects need to contain video; Assemble doesn't support audio-only projects at this time.
5. Working with Media
Click on the Bin and choose the file you want to load into the bin player:
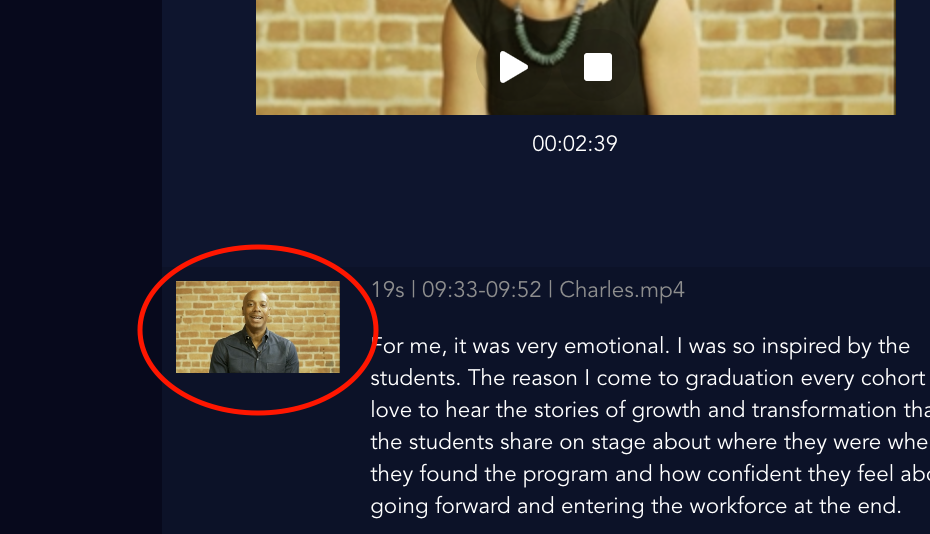
Your file's transcript will load on the bin/player side. Highlight soundbites and click the buttons to move it to the timeline side.
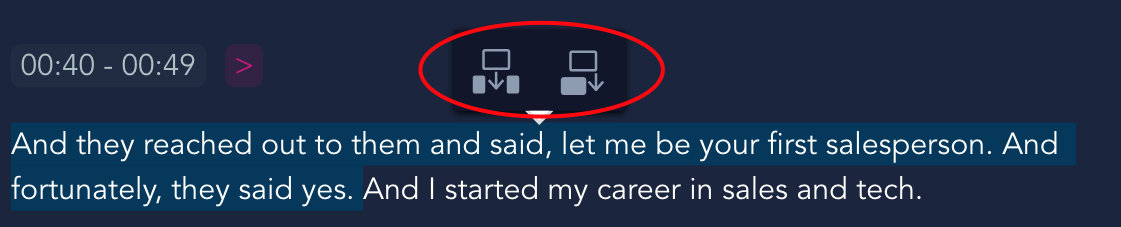
Drag and drop soundbites on the timeline side to order as you like. Use the Play/Pause and Stop buttons to advance the narrative you build. Click the thumbnail next to a soundbite to play your timeline from there.
6. Sharing your project
Now for the good stuff. Click the team icon in the upper right-hand to get a link to share the project, or to invite people via email address directly. You can set the permissions level to either edit, comment, or to simply view.
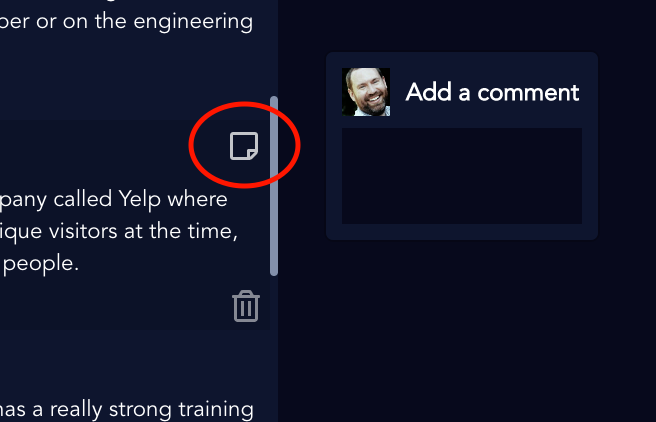
Teammates with comment or edit access can leave notes on specific soundbites, by clicking on the empty note icon.
7. Export sequence back to Adobe Premiere Pro
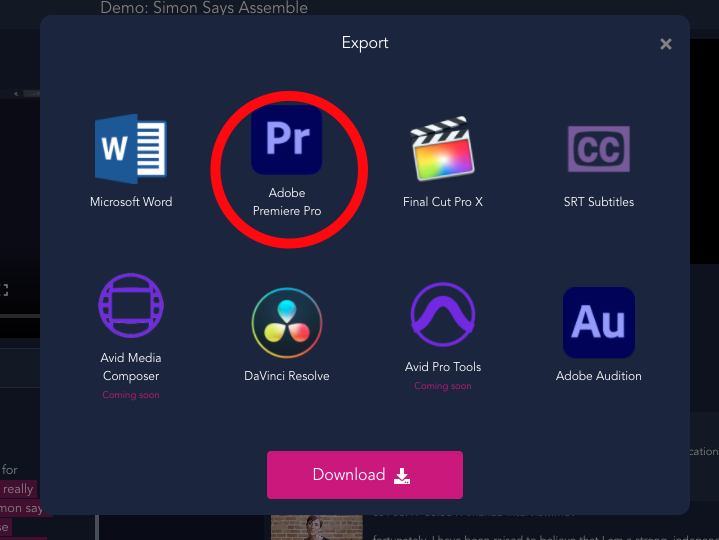
Click the Export button at the top right and then choose "Adobe Premiere Pro". An XML sequence file will download.
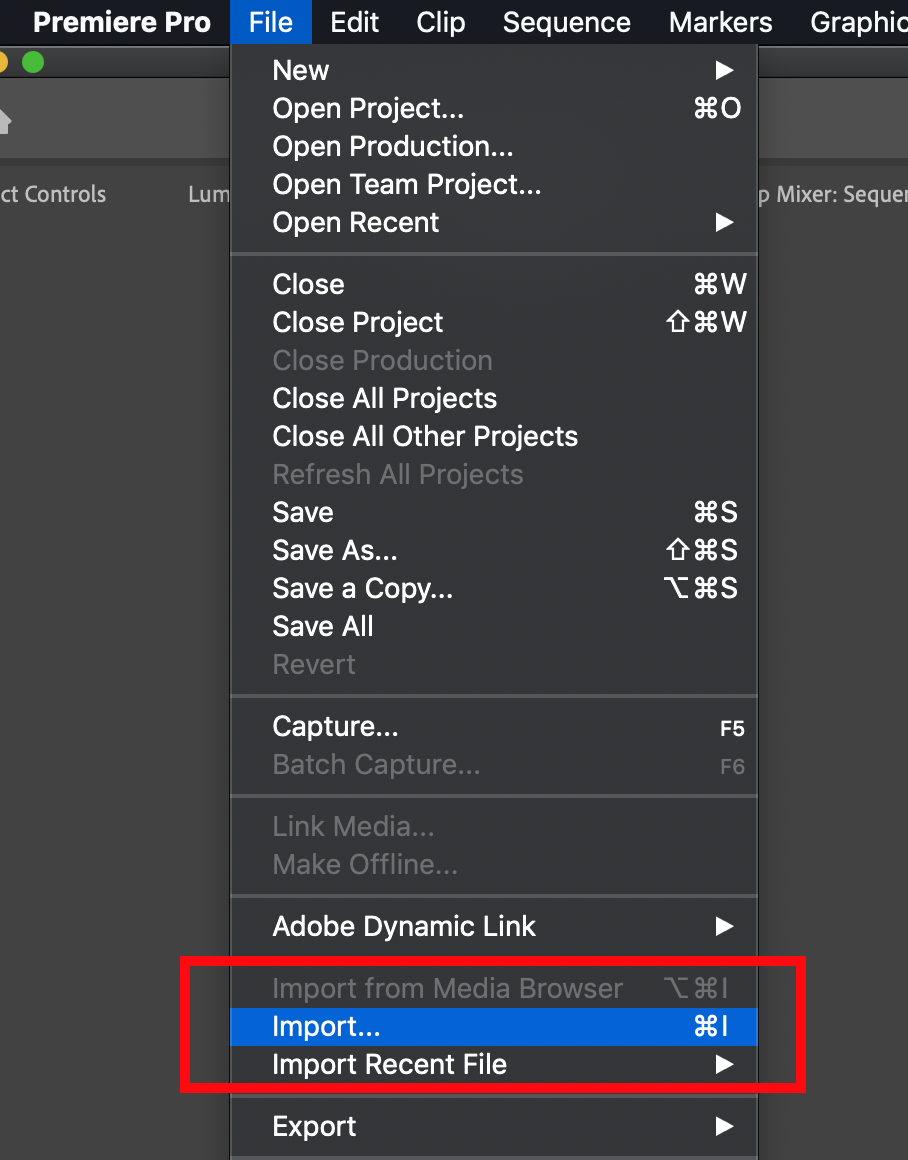
8. Relink: In Adobe, go to File > Import and choose the XML file you just downloaded.
You will get markers on the sequence and markers on the clips in the sequence.
Relink your clips to the version of media you started with. If you imported proxies but you want to relink the original media, force Adobe to link to the original by ignoring extensions.