Export for Blackmagic DaVinci Resolve (timeline/sequence transcript markers)
How to: receive timeline/sequence transcript markers in Blackmagic DaVinci Resolve from Simon Says (via EDL).

Note: you need to upload a video (not audio) to Simon Says for timeline markers to work in Resolve. This export does NOT work if you only import an audio file to Simon Says such mp3 / wavs. If you are importing via the Simon Says Mac app, make sure to turn-off "audio-only proxy".
The option to export to DVR timeline/sequence transcript markers is available via the Simon Says website and the Simon Says Mac app. Read on to learn how.
View the quick video tutorial or follow the instructions below. To view video subtitles in another language, click the settings icon in the video and select from an available language under Subtitles/CC.
- Sign up/login to Simon Says; create a new project; and upload your video file. (It needs to be a video file, not an audio file, for DVR timeline markers to work.) Transcribe it!
- Once your video transcribes, click the Export button (top right on the transcript page on the website). (Note: if you want translated timeline markers, then Translate the transcript before exporting. Learn how to Translate a project.)

3. A pop-up will appear (like in the image below). Select "Other" and then “DaVinci Resolve” from the submenu.
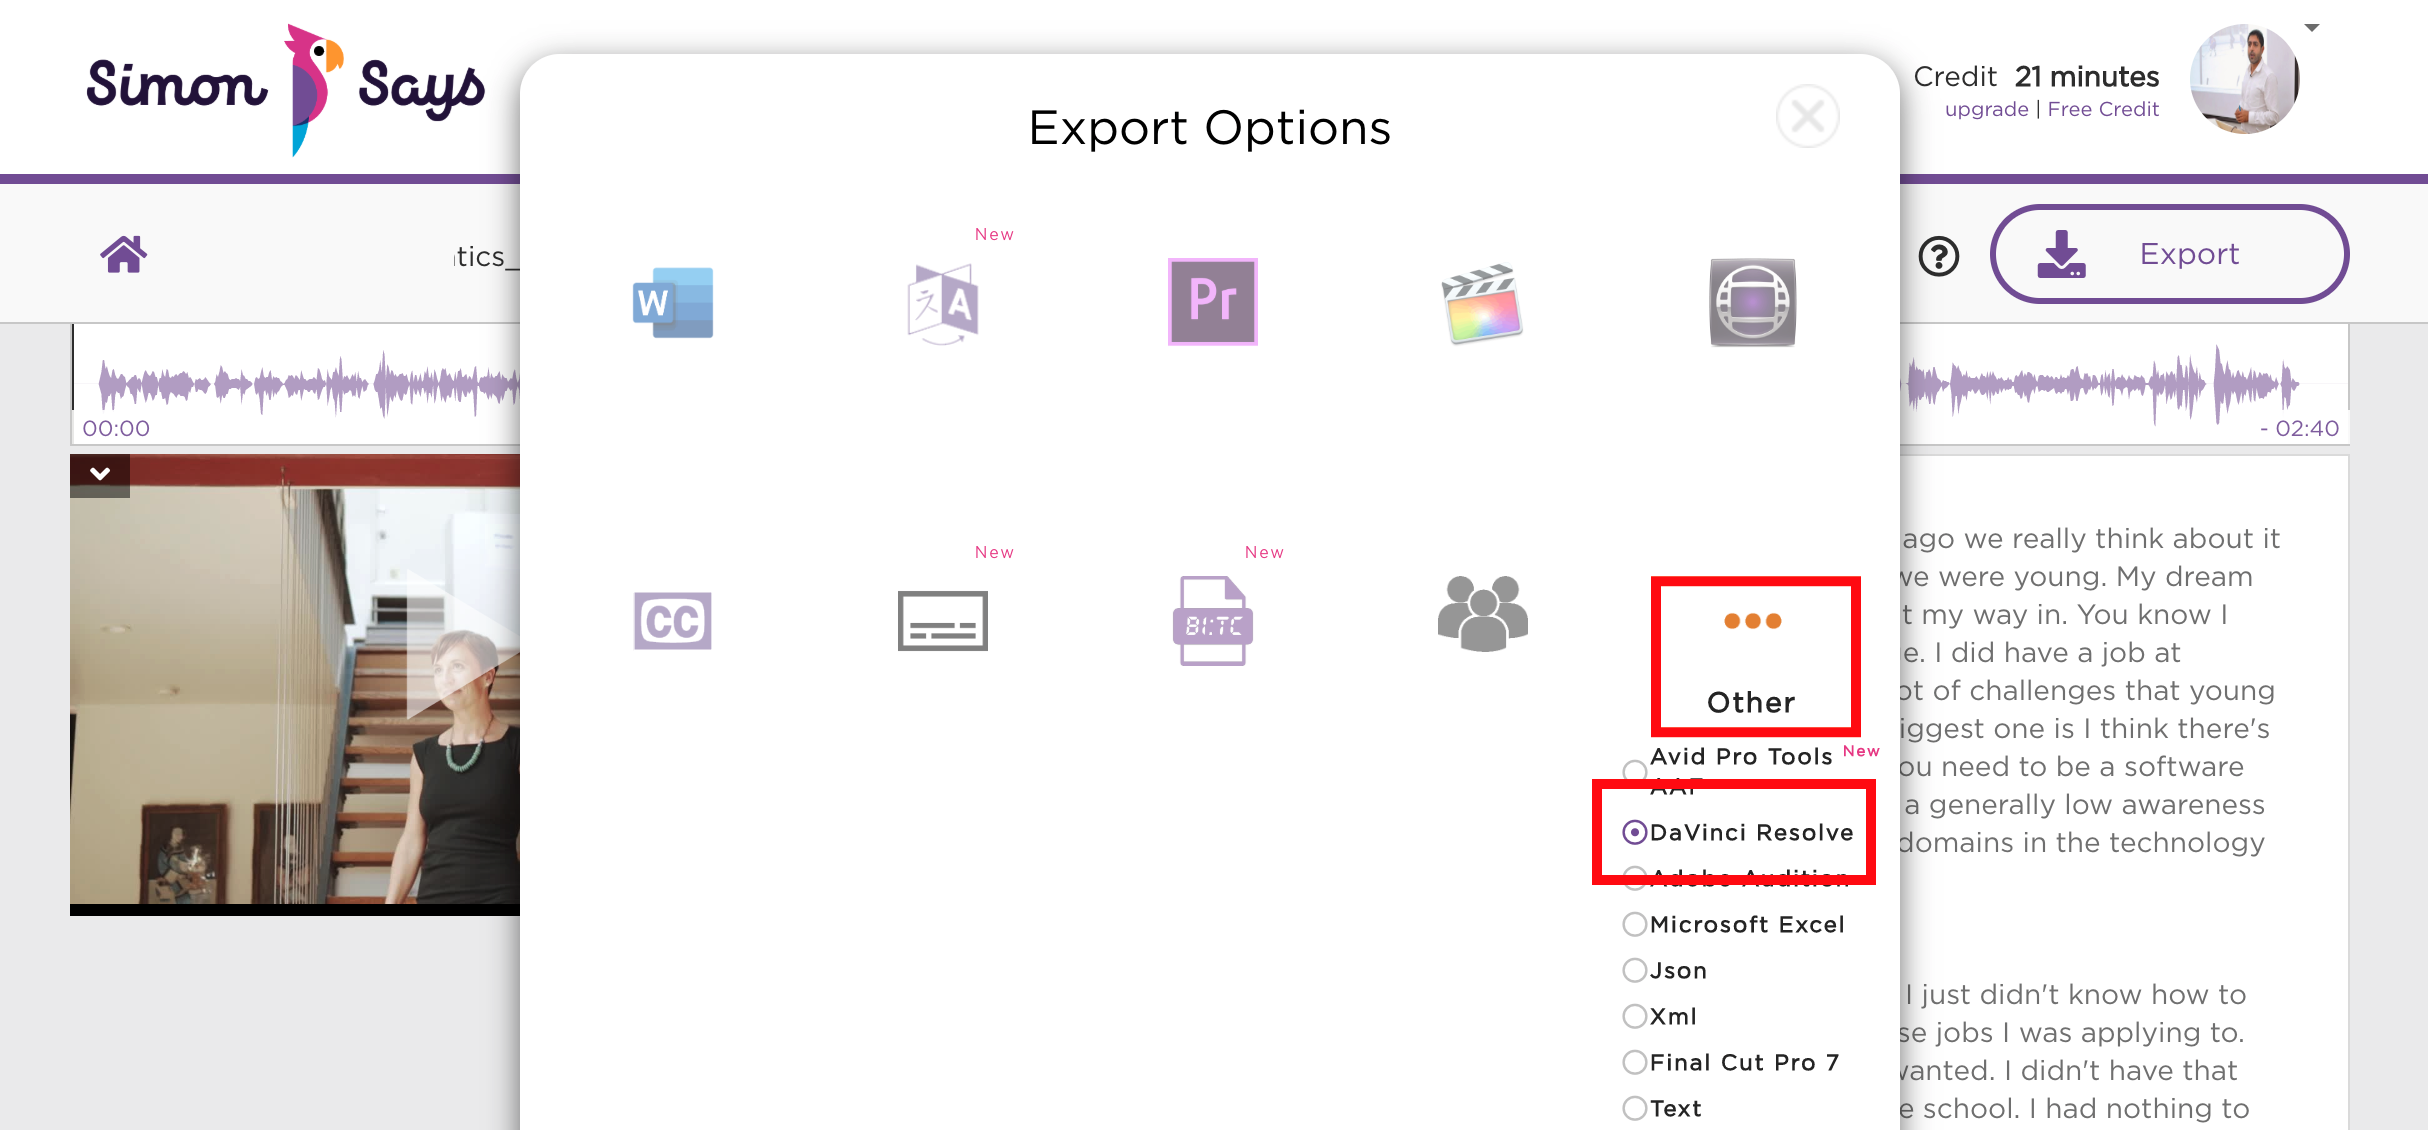
And then export and a zip file will download. Unzip it and an EDL file will appear.
4. Open Resolve with the media you transcribed. Then go to the “File” menu and click “Import Timeline” and then "Import AAF, EDL, XML" like this:
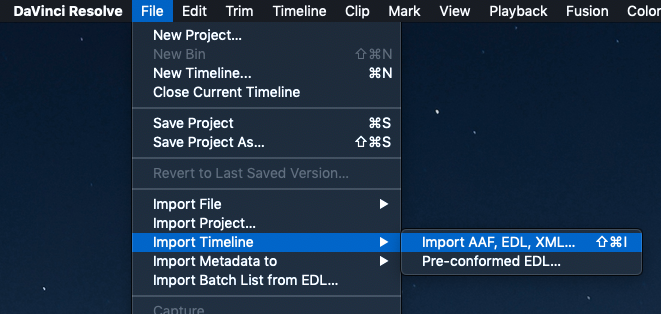
Navigate to the location of your EDL file which you exported from Simon Says.
5. You will see another box with options for setting up your timeline. Once you okay and the timeline is in your bin, right click that timeline and select "Timelines / Import / Timeline Markers from EDL" like this:
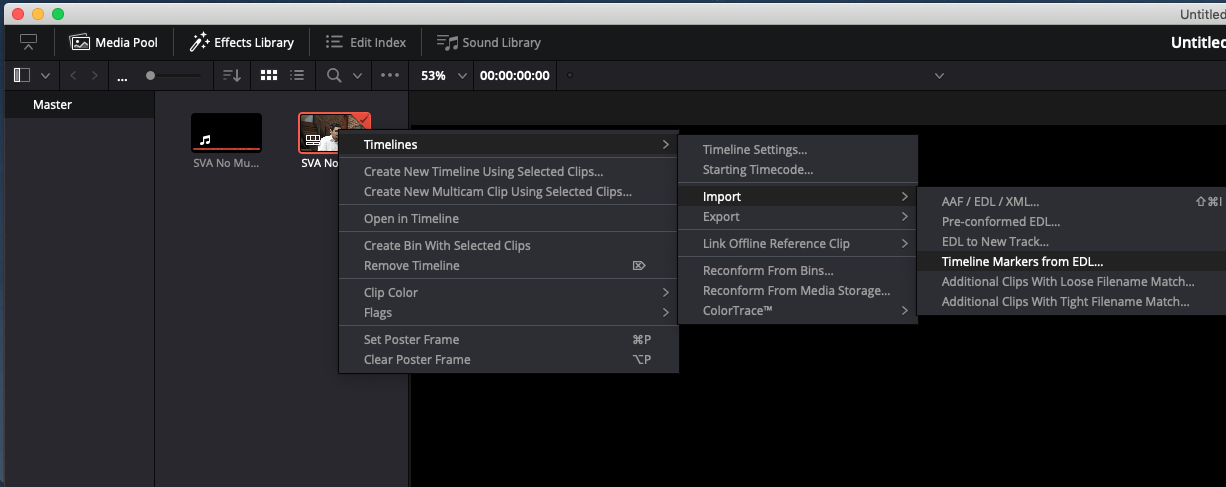
For the second time, go to the location of the EDL and import it again.
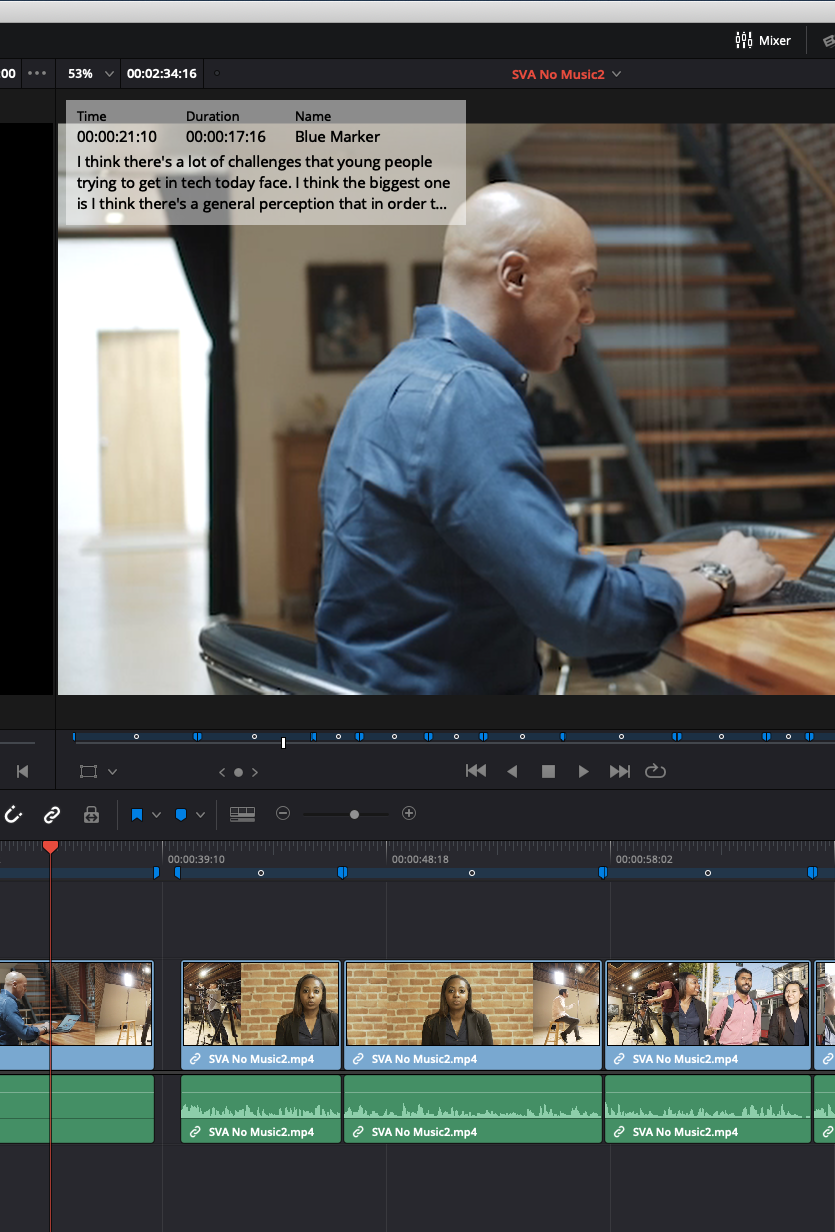
TaDa! Check the timeline/sequence and see the transcript markers!

Related Help Articles:
Auto-sync timecode, framerate, and resolution
Exporting video proxies from your NLE to preserve timecode/framerate through to transcript export
Avid Media Composer: Import your transcript from Simon Says directly into Avid with Text Locators
How to import SRT files into Adobe Premiere Pro
Best Practices for importing Multicam and Sync clips with the SS FCP X Extension
How to Export to Adobe Audition